Creating Oblique Views
Adjusting window leveling, zooming, and scrolling through datasets reformatted in orthogonal planes can provide a great deal of information. However, important structures don’t always follow orthogonal planes. In such cases, an oblique view whose angulation matches that of the feature of interest may provide essential information not available otherwise.
Dragonfly provides a number of options — the 3D Cursor and Walk tool, as well as the Yaw, Pitch, and Roll text annotations — for creating oblique and double-oblique views. Viewing structures in oblique planes can be further enhanced by using such rendering tools as maximum intensity projection (MIP). See Viewing Images in Slab Mode.
You can use the 3D Cursor to create an oblique or double-oblique view in corresponding MPR views.
- Display the required dataset in a multi-view MPR layout (see Scenes and Views).
- Click the Track
 tool in the Manipulate panel.
 - Position the 3D cursor at the required pivot point in an MPR view.
- Drag the Angle marker on the vertical or horizontal crosshair to create an oblique view in the corresponding MPR view.
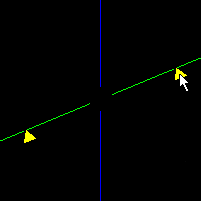
- Drag the Angle marker on the other crosshair to create a double-oblique view.
In this freehand oblique mode, you can create a view of a feature that lies in an oblique or double oblique plane.
- Display the required series in a multi-view MPR layout, recommended (see Scenes and Views).
- Click the Walk
 tool in the Manipulate panel.
 - Click on the required image at the desired pivot position and then drag the mouse in any direction to create a freehand oblique view.
- Click the Track tool to exit Walk mode when your adjustments are complete.
Refer to the topic Text Annotations for information about rotating 2D views with the text annotations around the so-called Euler angles named Yaw, Pitch, and Roll.
- Right-click the reformatted dataset and then choose Derive from Current View in the pop-up menu.
A new dataset is created and added to the Data Properties and Settings panel.
